
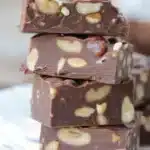
Gluten free Halloween fudge recipes provide a creamy, festive alternative to store-bought candy that often contains gluten or artificial ingredients. If you’ve struggled to find Halloween treats that are both safe for gluten-sensitive guests and delicious enough to impress everyone at your party, these fudge brownies deliver rich, chocolatey flavor in spooky, shareable squares that both kids and adults love.
The recipe combines simple ingredients like gluten free chocolate chips, sweetened condensed milk, butter, and vanilla to create an intensely fudgy texture without any complicated candy-making techniques. You’ll melt the chocolate mixture on low heat, add your flavorings and optional mix-ins, then pour into a prepared pan and chill for 2-3 hours until set. For Halloween decorating, you can swirl in food coloring, add candy eyes, Halloween sprinkles, or create themed designs on top before chilling.
The entire process takes less than 20 minutes of active prep time, with most of the work happening in the refrigerator. What makes this recipe particularly appealing is its foolproof nature and versatility, you can customize with different chocolate types, add nuts or peppermint, or adapt the decorations for any holiday throughout the year. Each batch yields 16-20 squares perfect for trick-or-treaters, party favors, or homemade gifts for friends with celiac disease or gluten sensitivity.

Gluten free Halloween fudge Recipe Ingredient Notes
Okay, so here’s where I need to be kind of picky. Gluten-free baking is a little finicky. You’ll want high-quality cocoa, not just whatever you find shoved at the back of your cabinet since last Easter. Get a gluten-free flour blend that’s actually meant for baking , trust me, pancake mix isn’t the same thing. The rest is pretty basic, thankfully.
Making these extra-creamy? Use both melted dark chocolate and cocoa powder. Oh , and don’t skip real butter. I tried using some oil once when we ran out of butter… total flop. Even monsters wouldn’t eat those!
Decorating? Grab Halloween-themed candy eyeballs, some orange sprinkles, or even those gummy worms (just check they’re gluten-free). I like a little black gel icing for a finishing touch. Makes ’em scream-worthy!
Everyone has seen recipes stuffed with extras, but sometimes, simple wins. Good ingredients, good flavor. That’s it.
| Ingredient Substitution Notes | ||
| Butter | Vegan Butter | For dairy-free options, use a plant-based substitute. |
| Eggs | Flaxseed Eggs | Mix 1 tbsp ground flaxseed with 2.5 tbsp water for each egg. |
| Granulated Sugar | Maple Syrup | Use 3/4 cup of maple syrup for 1 cup of sugar, but reduce liquid in the recipe. |
| All-Purpose Flour | Gluten-Free Flour Blend | Ensure it is made for baking for best results. |

How to make Gluten Free Brownies
Heads up, I’m not a “sift your flour three times” kind of baker. I keep this simple. You’ll melt your chocolate with the butter (in the microwave, please, life’s too short). Whisk your eggs and sugar till it looks glossy and smooth, then pour that heavenly chocolate right in. Add flour mix and cocoa. Don’t overthink it , gentle folds, not a workout.
Pour it into a lined pan. The batter’s kinda thick, so you’ll want a little patience smoothing it out. Sometimes I get a random lump but, whatever, it’s homemade right?
Bake in a preheated oven, but keep an eye on it. Gluten-free bakes faster. Wait for that smell: if it smells like a chocolatier moved next door, you’re nearly done.
Resist poking at it or, I dunno, sticking your face right in the pan , believe me, I’ve failed at that part. Let it cool before cutting or decorating, or you’ll have a globby mess. (Still tasty, mind you. Just messy.)

How to check your brownies for doneness
This bit can get awkward, especially if you’ve battled with sticky, underdone brownies before. Here’s what I do. Forget the toothpick test for a second , with fudge brownies, you want a little goo. If the top is shiny and cracked, you’re close. Push gently in the middle with your finger; it should feel set but just a tiny bit soft.
If a toothpick comes out with wet batter, give it a few more minutes, but if it’s slightly streaked with chocolate (but not goopy), that’s perfect! Overbake these and you’ll need a chainsaw to cut them. And don’t panic if the edges pull away from the pan a bit , that’s actually ideal!
Let them cool completely before you yank them out or they’ll fall apart. Trust me, patience is a virtue here , or at least it helps with your brownie faces staying monster-shaped!
Simple Way to decorate the Gluten Free Halloween Brownies
Now, let’s have fun. When the brownies are cooled off (I know, I know, the waiting hurts), slice into chunky squares. You can go full-on Halloween chaos here. Here’s what I usually do:
- Plop on a pair of candy eyeballs for instant monsters.
- Drizzle orange or green icing in messy swirls , more splatter equals more scary.
- Grab those gluten-free gummy worms and let them “crawl” over your brownies.
- Throw on sprinkles or mini marshmallows for, well, whatever creature you’re trying to create.
I’ve seen people make spiderwebs with icing and stick a plastic spider on top. Kids go wild for that. No rules here, just spooky, sugary fun.
Substitutions and Modifications
Maybe your pantry looks a little empty or someone has another allergy. No sweat. Swap the butter with vegan butter if you’re dairy-free. Eggs? Apparently, flaxseed “eggs” do work, though they’re a bit more crumbly. Can’t stomach chocolate? Well, you might be a vampire, but try subbing carob powder.
You can also toss in nuts for crunch, or leave them out if your crew’s allergic. Maple syrup instead of part of the sugar brings a cool autumn vibe. Just steer clear from anything with sneaky gluten (seriously, always check those labels), and you should be golden.
Creative Halloween Fudge Decorating Ideas and Allergy-Friendly Variations
Want to wow party guests or classroom friends? Get spooky with fun toppings! Try drizzling melted white chocolate in “web” patterns, adding colorful marshmallows for monster “teeth,” or using piped black icing to create mini bats and ghosts. Orange and green candy melts make stripes or “slime” effects, while candy eyes and gluten-free sprinkles add instant personality to each piece.
Need allergy-friendly options? Swap traditional toppings for nut-free candies, use vegan butter and plant-based condensed milk, and skip artificial colors in favor of natural sprinkles or fruit powder for tinting the icing. If you have dairy allergies in the crowd, coconut milk condensed milk works as a substitute for sweetened condensed milk, and dark chocolate chips are often dairy-free (just double-check labels).
For extra festivity, use mini cookie cutters to shape fudge into pumpkins, cats, or cauldrons after chilling. Or bag up decorated squares in Halloween-themed cellophane for cute, gluten-free party favors.
No matter your decorating style or allergy needs, these gluten free Halloween fudge brownies can be made to delight every guest, and look spooky-spectacular on your holiday snack table!
How to Store, Freeze, and Prep Gluten Free Halloween Fudge Brownies for Parties
Making ahead? No problem! Gluten free Halloween fudge brownies are the ultimate prep-friendly treat. After baking and fully cooling, cut brownies and layer them in an airtight container with parchment or wax paper between each row, they’ll stay moist and fudgy for up to 4 days at room temperature. Want to freeze for longer? Wrap individual squares tightly in plastic wrap, then stash in a freezer-safe bag or container for up to two months. Thaw at room temp before decorating or serving.
For parties, you can easily prep fudge brownies a day or two in advance. Wait to add decorative toppings until right before your event, so colors stay bright and sprinkles stay crisp. If you’re packaging brownies as party favors or bake sale items, use Halloween-themed bags or boxes for a festive touch.
Need to serve a crowd? Double (or triple) the batch and use a larger pan, adjusting bake time as needed. Display on a decorated platter, stack in treat towers, or serve with allergy-friendly fruit skewers, these brownies fit every party setup and travel beautifully for trick-or-treat nights, potlucks, and school events. Enjoy stress-free Halloween snacking!
Common Questions
Do I need a stand mixer for this?
Nope. Whisk and strong arms are enough. More rustic, less mess.
How long do these gluten-free Halloween fudge brownies keep?
I’d say three or four days in an airtight container. Good luck making them last that long, though.
What size pan should I use?
An 8×8 inch square pan works every time. For thinner brownies, bigger pan. Easy as that.
Can I freeze these brownies?
Absolutely. Just wrap them good, or else they pick up freezer smells. Thaw before you decorate though.
What’s the best way to cut the brownies?
Use a sharp knife and wipe it between slices. I learned this after years of ugly squares and, honestly, forehead slapping.
More Fudge Than Fright
You don’t need to be a pastry expert to make fudge brownies that are both gluten-free and perfect for Halloween parties. With a little patience and some creative decorating, these brownies will delight every guest, spooky season after spooky season. Don’t forget to stock up on those fun seasonal candies early, they tend to disappear fast! For expert advice on gluten-free baking and ensuring food safety, visit these trusted sources:
Get ready to whip up a batch, embrace the kitchen mess, and enjoy the real magic of homemade Halloween treats!
Gluten Free Halloween Fudge Brownies
Ingredients
Brownie Ingredients
- 1 cup melted butter Use real butter for best results.
- 1 cup dark chocolate Melted for a richer flavor.
- 2 large eggs Whisk till glossy and smooth.
- 1 cup granulated sugar Can substitute with 3/4 cup maple syrup.
- 1 cup gluten-free flour blend Ensure it is made for baking.
- 1/2 cup cocoa powder Use high-quality cocoa.
Decoration
- 1 cup Halloween-themed candy eyeballs For decorating the brownies.
- 1 cup orange sprinkles Optional for extra decoration.
- 1 package gluten-free gummy worms Ensure they are gluten-free.
- 2 tbsp black gel icing For finishing touches.
Instructions
Preparation
- Preheat the oven. Melt the dark chocolate with the butter in the microwave.
- In a bowl, whisk the eggs and sugar until glossy and smooth.
- Pour the melted chocolate mixture into the egg and sugar mixture and mix well.
- Gently fold in the gluten-free flour blend and cocoa powder until just combined.
Baking
- Pour the batter into a lined 8×8 inch square pan and smooth it out.
- Bake in the preheated oven for about 25 minutes, keeping an eye on it as gluten-free brownies bake faster.
- Check for doneness: the top should be shiny and cracked; push gently in the center – it should feel set but soft.
- Let the brownies cool completely before cutting them.
Decoration
- Once cooled, slice the brownies into squares.
- Decorate with candy eyeballs, drizzle icing, and add gummy worms or sprinkles as desired.