
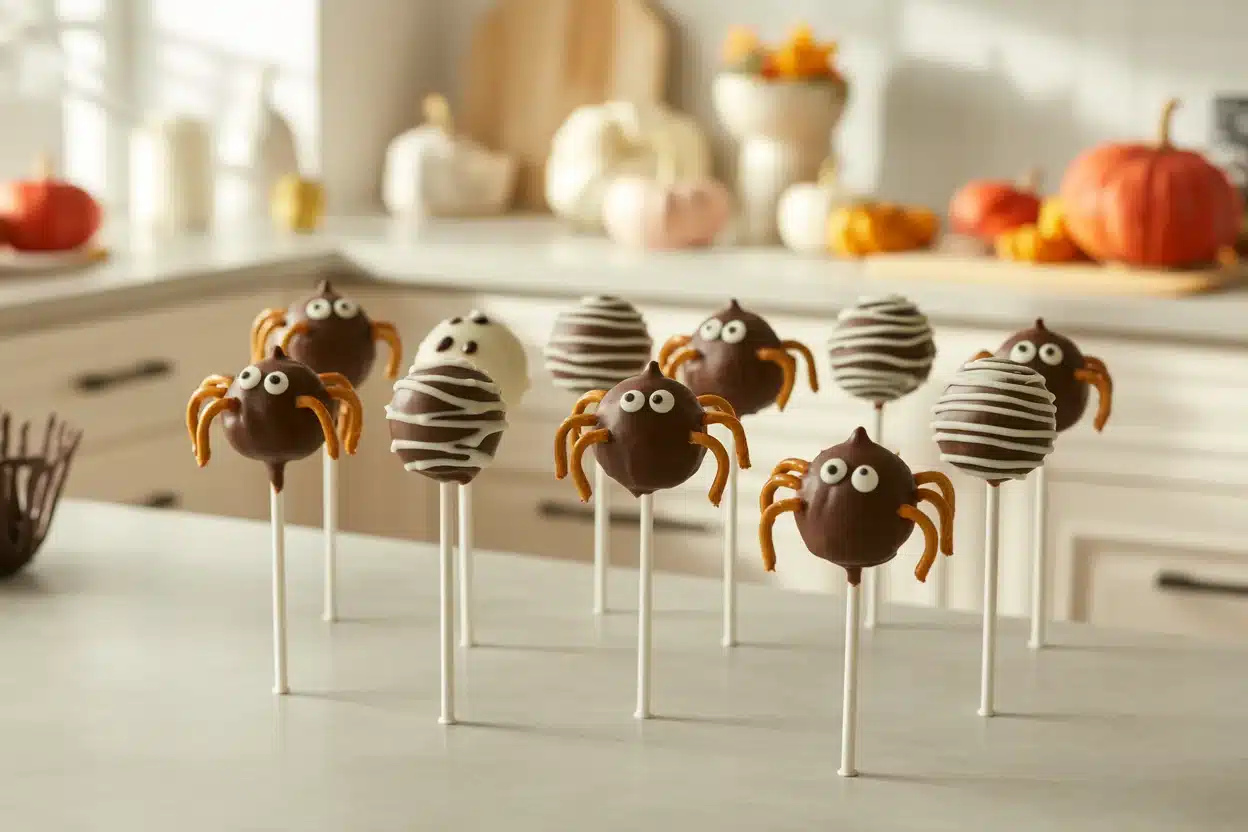
Making gluten free Halloween cake pops ensures everyone at your party can enjoy festive treats without worrying about dietary restrictions. If you’ve struggled to find suitable Halloween desserts at parties where traditional cupcakes and cookies dominate, these cake pops offer a delicious and visually impressive solution that looks and tastes just like café-quality desserts.
The recipe starts with a gluten free chocolate or vanilla cake baked using a certified gluten free cake mix or homemade recipe, which you’ll then crumble and mix with frosting to create a moldable mixture. After rolling the mixture into uniform balls and chilling them in the freezer for 30 minutes, you’ll dip each ball in melted candy melts, then decorate with Halloween-themed designs like monsters, ghosts, or spiders using candy eyes, sprinkles, and edible decorations.
The entire process takes approximately 90 minutes including baking and chilling time. What makes these cake pops particularly appealing is their professional appearance combined with complete gluten free safety when using certified ingredients. Each batch yields 12-15 cake pops, perfect for classroom parties, Halloween gatherings, or thoughtful gifts for friends with celiac disease or gluten sensitivity. The finished pops can be stored in an airtight container for several days or frozen for longer-term storage.
Why we love this recipe
Gluten-free Halloween cake pops bring joy to any celebration, offering a delightful surprise when guests discover they’re enjoying miniature decorated cakes on sticks. These festive treats feature creative designs like one-eyed monsters, friendly ghosts, and other spooky characters that capture the Halloween spirit perfectly.
One of the biggest advantages of this recipe is its accessibility. Unlike many gluten-free baking projects, these cake pops don’t require specialty ingredients or expensive substitutions. This makes them an ideal choice for families managing celiac disease or gluten sensitivities, ensuring everyone can participate in Halloween festivities without feeling excluded.
The recipe offers flexibility for various skill levels and time constraints. Busy home bakers can use boxed gluten-free cake mix for convenience, while those seeking a more hands-on approach can prepare everything from scratch. Either method produces cake pops that maintain excellent structural integrity and deliver the same rich flavor as traditional versions.
These gluten-free Halloween treats create an inclusive party atmosphere where dietary restrictions don’t limit the fun. The combination of moist cake, creamy frosting, and smooth candy coating ensures a satisfying texture and taste experience that rivals any conventional dessert.
| Tip Description | |
| Use a Gluten-Free Cake Mix | Saves you time and guarantees a texture that holds up well in cake pops. |
| Chill Your Cake Balls | Freezing for 30 minutes ensures they stay intact when dipped in chocolate. |
| Experiment with Toppings | Use edible glitter, spooky sprinkles, or candy eyes for creative flair. |
| Store Properly | Keep in an airtight container or freeze for long-lasting freshness. |
What ingredients you need for gluten-free Halloween Cake Pops
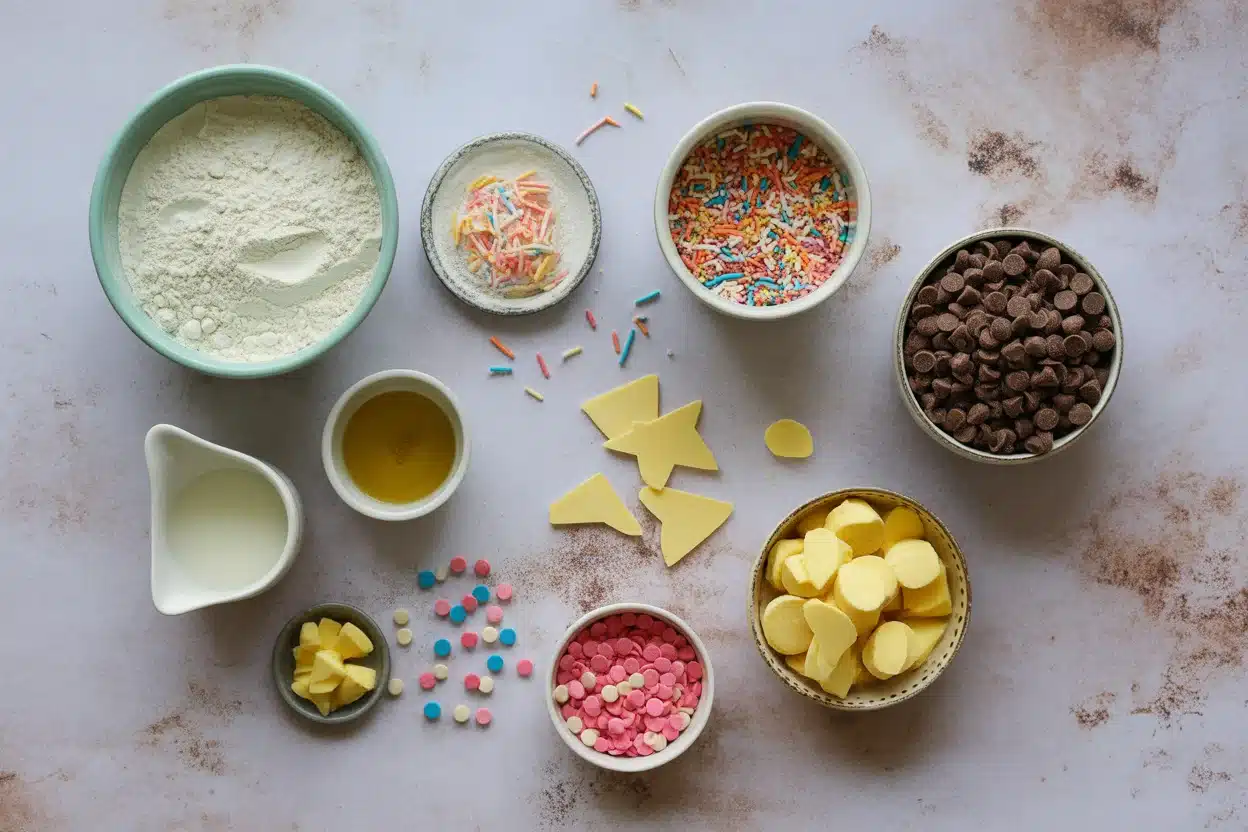
Alright, so don’t panic looking at this list. Here’s what you’re stuffing into these festive beauties:
- 1 gluten-free cake mix (vanilla or chocolate works, your call)
- Eggs, oil, and whatever the box says for making the cake
- 1 cup gluten-free frosting (store-bought is totally fine)
- Candy melts (your Halloween colors: orange, purple, black, white)
- Lollipop sticks (grab ‘em at any craft store)
- Sprinkles, edible eyes, tiny candies (honestly, just whatever strikes your spooky mood)
- Wax or parchment paper (counters get messy, always) That’s about it. Nothing fancy-pants. Half the stuff already lives in your pantry.
How to make Halloween Cake Pops
Begin by preparing your gluten-free cake according to package directions or your preferred recipe. Allow the cake to cool completely before moving to the next step.
Once cooled, crumble the entire cake into fine pieces using your hands in a large mixing bowl. This tactile step makes it an excellent activity for children who want to help in the kitchen. Add frosting to the crumbled cake and mix thoroughly until the mixture reaches a dough-like consistency that holds together when rolled but isn’t overly wet.
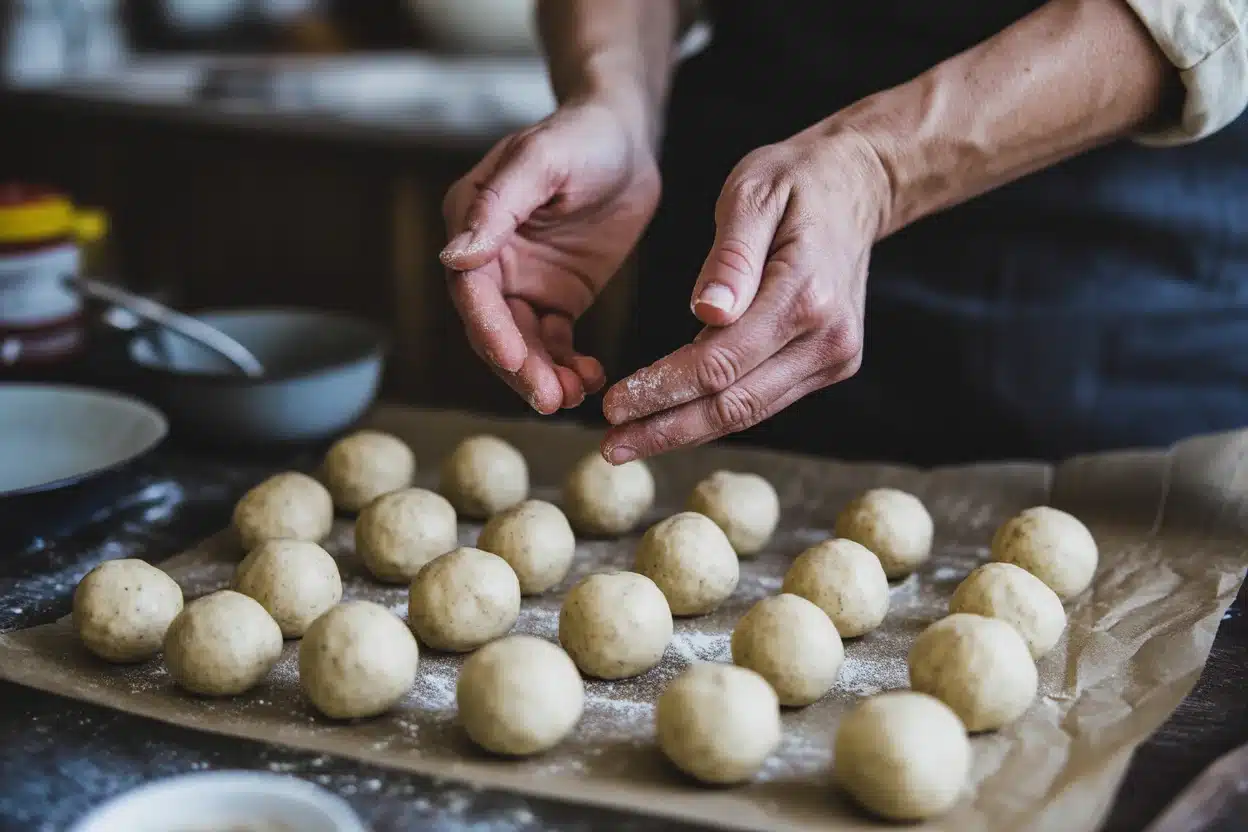
Test the texture by forming a small ball. If it maintains its shape without cracking, the consistency is perfect. Shape the mixture into uniform balls approximately the size of ping-pong balls and arrange them on a baking sheet. Place the tray in the freezer for 30 minutes to firm up the cake balls.
While the balls chill, melt candy coating wafers in the microwave according to package instructions. Dip each lollipop stick about half an inch into the melted candy, then insert it into a chilled cake ball. This technique ensures the stick stays securely attached during the coating process.
Carefully dip each cake pop into the melted candy coating, rotating gently to cover all sides. Allow excess coating to drip off before adding decorative elements like candy eyes, sprinkles, or themed embellishments. Work quickly while the coating is still wet to ensure decorations adhere properly.
Place finished cake pops upright in a foam block or lay them on waxed paper to set completely. The candy coating will harden within 15-20 minutes at room temperature.
Substitutions & Variations
So, your pantry’s missing a few things or you want to shake things up? I’m a fan of “use what you got.” For these gluten free Halloween cake pops, you can swap vanilla cake for chocolate or even red velvet. If canned frosting’s not your thing, cream cheese frosting tastes ridiculous here (in a good way). Dairy-free? Use plant-based frosting and candy melts. And you absolutely can make cake pops shaped like mummies, pumpkins, or bats, if I can do it, seriously, you can too. Different holidays? Skip the eyeballs and go with Valentine or Christmas decorations. Oh, and pro-tip: these freeze well, so make a big batch for later and thank yourself next week.
Serving Ideas
- Arrange pops in a foam block for a spooky centerpiece.
- Pass ‘em out in baggies as party favors. So cute.
- Pile them on a plate covered with fake spiderwebs for max Halloween vibes.
- Or, just, you know, eat them straight off the stick at midnight. Live a little.
Allergy-Friendly & Vegan Halloween Cake Pop Tips
Want to make sure everyone at your party can enjoy these spooky cake pops? It’s easy to modify for most allergies and preferences. For dairy-free cake pops, opt for vegan cake mix, plant-based frosting, and dairy-free candy melts, plenty of options are now available at grocery stores. For egg allergies, use a gluten-free cake mix that works with flaxseed or applesauce as a binder (check box instructions or trusted vegan baking guides).
Watch out for candy coatings and sprinkles, which can hide gluten or dairy, always check labels before dipping. For nut-free pops, select topping brands confirmed safe in nut-free facilities and skip any nut-flour cake mixes.
Even if you need to avoid food dyes or artificial flavors, make your own colored frosting using natural powders like beet or turmeric, or decorate with naturally colored, allergy-friendly candies. This lets every ghoul and goblin, no matter their needs, join in the Halloween fun.
Serve allergy-friendly cake pops on a separate tray or wrap them individually to keep all guests safe. With a few simple tweaks, your gluten free Halloween cake pops become the ultimate inclusive treat for any party!
How to Store, Make Ahead, and Decorate Gluten Free Halloween Cake Pops
Storing & Making Ahead:
Keep your gluten free Halloween cake pops in an airtight container at room temperature for 2–3 days, they’ll stay moist and delicious. For longer storage, freeze undipped cake balls in a zip bag and decorate just before your event. To prevent smudged decorations or color bleeding, wait to add candy eyes and sprinkles until after dipping and setting. If you must store finished cake pops, layer them gently with wax or parchment paper to keep their spooky designs safe.
Batch Prep for Parties:
Need a big batch for a class party or Halloween potluck? Double the recipe and set up an assembly line: bake/cool cake, crumble/mix with frosting, roll balls, insert sticks, and chill in trays. Once dipped and decorated, stick cake pops upright in a foam block or cardboard box for easy transport and show-stopping presentation.
Decorating Like a Pro:
No fancy tools needed, dimples and drips are welcome for Halloween! Use piping bags for mummy “wraps” or monster mouths, swirling two colors of candy melts for marbled pops. Let kids go wild with extra candy eyes, edible glitter, or “scar” lines in black or red colored icing. Want creative shapes? Mold cake balls into pumpkins, ghosts, or even bat wings, a little weirdness just makes them more festive.
Pro Tip:
Set up a DIY decorating station at your party to turn cake pop decorating into the main event! It’s messy, fun, and means every guest gets a custom treat nobody will forget.
Common Questions
Can I make these gluten free Halloween cake pops ahead of time?
Definitely! They keep for several days in an airtight container or even longer if you freeze them. Just don’t refrigerate after dipping or the candy shell can get weird-looking.
Is it possible to use homemade cake instead of boxed cake?
Absolutely. Any gluten free cake you like works, grandma’s recipe or boxed, either is fine.
What’s the trick for smooth candy coating?
Honestly, practice helps. Make sure your cake balls are cold but not frozen and tap off the extra candy melt.
Can I rush and skip freezing?
Don’t do it. If you dip warm, soft cake balls, they’ll probably fall apart and you’ll get grumpy (I did).
How do I transport them to a party?
Stick each one upright in a piece of foam in a box or, lay them flat and separate layers with wax paper. They travel better than regular cupcakes, I’ll say that!
Ready to Get Spooky in the Kitchen?
Baking gluten-free Halloween cake pops is easier, and more enjoyable, than you might imagine. With a few simple steps and limitless decorating options, everyone gets to join in the seasonal fun, so no one has to miss out. These treats are just as delicious (and cute) as anything you’d find at a professional bakery. So why not give them a try? And if you want reliable guidance on gluten-free baking or managing food allergies safely, these official sites provide trustworthy resources:
- U.S. Food & Drug Administration: Gluten-Free Food Labeling
- Centers for Disease Control and Prevention (CDC): Food Allergies in Schools
Embrace the mess, unleash your creativity, and remember: the quirkiest cake pops always turn out to be the most memorable!
Gluten Free Halloween Cake Pops
Ingredients
Cake Base
- 1 box gluten-free cake mix Vanilla or chocolate works.
- Eggs, oil, and whatever the box says for making the cake Follow the instructions on the cake mix box.
Frosting and Coating
- 1 cup gluten-free frosting Store-bought is totally fine.
- 1 bag candy melts Choose Halloween colors: orange, purple, black, white.
- Lollipop sticks Available at any craft store.
- Sprinkles, edible eyes, tiny candies Use whatever strikes your spooky mood.
Miscellaneous
- 1 sheet wax or parchment paper For setting the finished pops.
Instructions
Preparation
- Bake the gluten-free cake according to the box instructions.
- Once the cake has cooled, crumble it into a bowl using your hands.
- Mix in the frosting until the mixture is doughy but not soggy.
- Shape the mixture into ping-pong size balls and place them on a tray.
- Chill the cake balls in the freezer for 30 minutes.
Coating
- Melt the candy melts in the microwave.
- Dip a lollipop stick into the melted candy and then poke it into a cake ball.
- Dunk the entire cake ball into the melted candy, swirl around, and shake off the excess.
- Quickly add toppings such as eyes and sprinkles before the candy sets.
Setting
- Let the coated cake pops set on waxed paper until firm.