
Snowman Cake Pops are the ultimate holiday party solution when your schedule is packed and you want something charming for the dessert table. These festive treats look impressive and professional while remaining simple to create, making them perfect for busy hosts who refuse to compromise on presentation. The process is relaxing and intuitive, requiring only basic skills and minimal ingredients to transform into adorable, crowd-pleasing bites.
This recipe thrives on its accessibility and flexibility, allowing children to participate in the creation process while producing professional-looking results. Snowman cake pops travel well for school parties and office potlucks, arriving intact and ready to impress. The straightforward assembly process involves rolling cake mixture into balls and dipping them in chocolate, followed by simple decoration, making it an ideal project for hosts seeking impressive desserts without stress or complicated techniques.
Whether you’re hosting a holiday gathering or contributing to a festive event, Snowman Cake Pops deliver both charm and genuine satisfaction. The recipe respects your time while producing memorable results that guests always appreciate. One cake pop reminds everyone why these treats have become a beloved holiday tradition, offering genuine delight and playful spirit that captures the joy of seasonal celebrations.
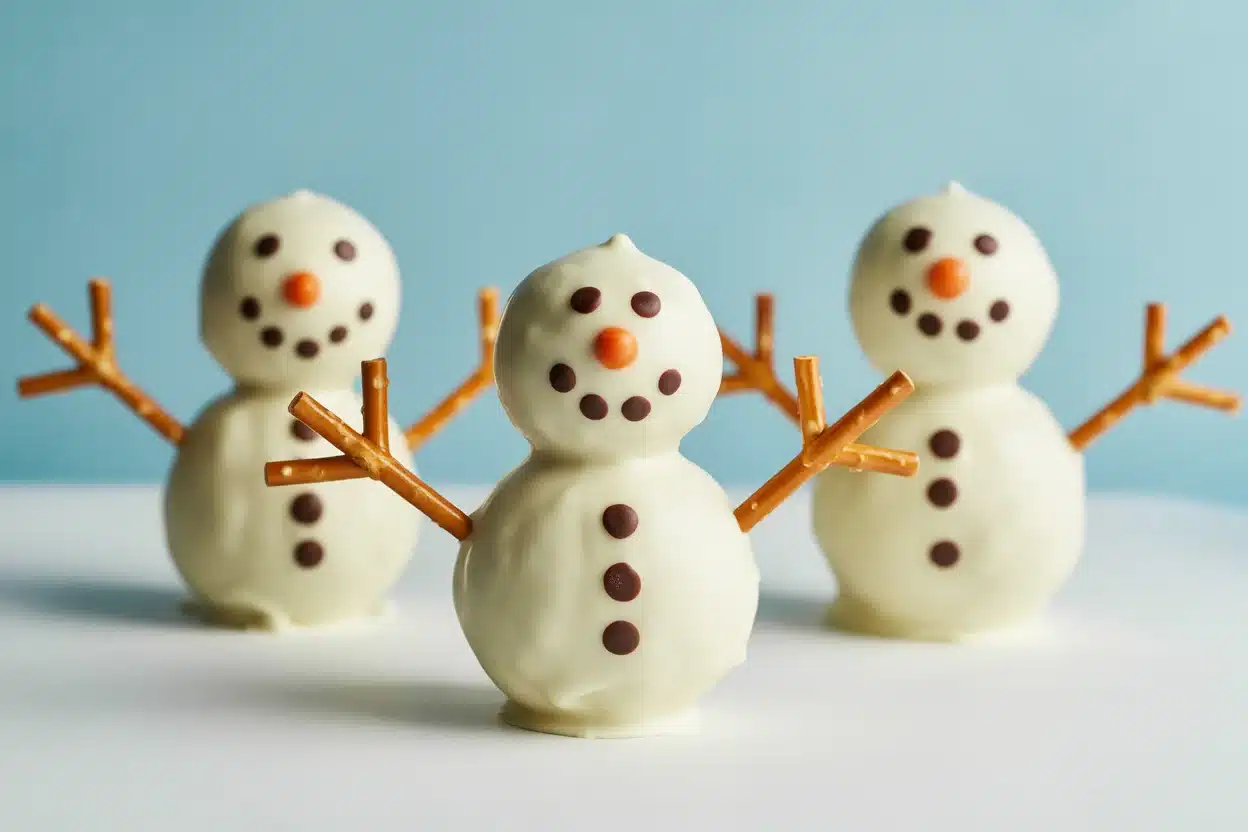
WHY YOU’LL LOVE MAKING THESE EASY SNOWMAN CAKE POPS
These pops check every holiday box for me. They’re cute, make ahead friendly, and surprisingly forgiving if your decorations are a little wonky. Honestly, that’s part of their charm. Here’s what I love about making them for friends and family:
They’re easy to customize. You can use any cake flavor you like, mix and match candy melts, and pick sprinkles that match your party colors.
They’re crowd pleasers. The first thing people say is “awww.” The second thing is “can I have one?” They’re perfect for kids and grown ups who want a small treat.
They’re perfect for gifting. Wrapped in small bags with a ribbon, they look like store bought goodies. I’ve dropped them on neighbors’ porches more than once and got grateful texts before I even got back inside.
They’re beginner friendly. If you’ve never dipped a cake pop, these are a great starting point because the round snowman shape is forgiving, and any imperfections become personality.
If you like seasonal treats that are super fun and easy, peek at my dessert pops for more inspiration you can carry into New Year parties too.
INGREDIENTS YOU NEED FOR THE ADORABLE SNOWMAN CAKE POPS
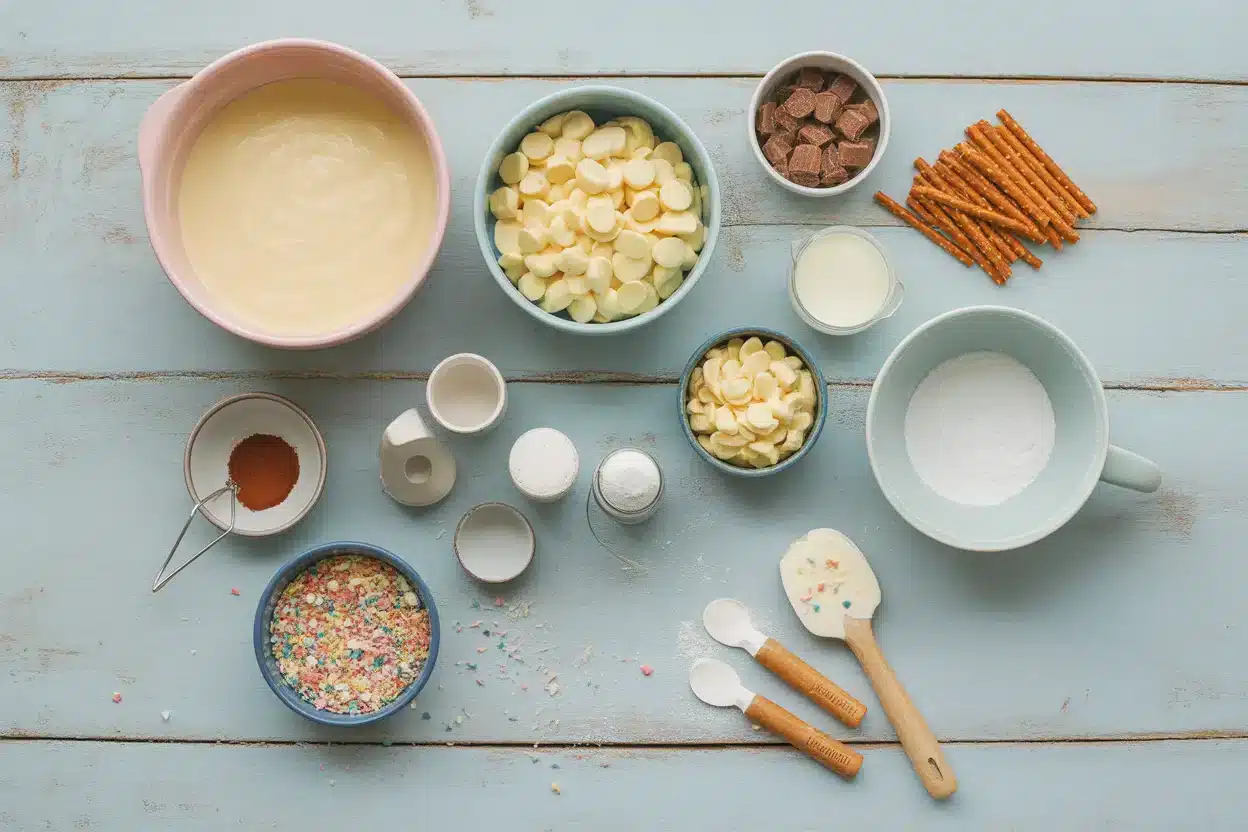
Here’s what you need to make these little winter buddies. Keep it simple and use your favorite boxed cake and tub of frosting. Nobody can tell once they’re dipped and decorated, and you save time for the fun part.
- 1 baked cake any flavor you love. Vanilla, chocolate, red velvet, or spice cake are all winners.
- Frosting about 2 to 4 tablespoons to bind. Start small and add as needed.
- White candy melts for that snowy coat. You can also use white chocolate, but melts set faster.
- Vegetable shortening or coconut oil just a teaspoon or so to thin the melts if needed.
- Cake pop sticks or lollipop sticks.
- Mini orange candy for noses. I use orange sprinkles, orange jimmies, or tiny orange fondant wedges.
- Black edible marker or black sprinkles for eyes and buttons. Mini chocolate chips work too.
- Licorice laces, fruit strips, or candy belts for scarves. Colored melted candy in a piping bag also works.
- Mini peanut butter cups, mini cookies, or chocolate discs for hats. Optional, but adorable.
- Sprinkles tiny snowflake or white sanding sugar for extra magic.
Handy Tools You’ll Be Glad You Have
Cookie scoop for consistent sizes, a foam block or upside down egg carton to hold pops upright while they set, bowls for melting, and a sheet pan lined with parchment. If you love seasonal projects, my quick guide to Halloween dessert pops shares more tool tips that carry over to winter baking.
HOW TO MAKE
We’ll make a simple cake and frosting mixture, roll it into balls, dip, and decorate. That’s it. Here’s my low stress method with notes on what to watch for so your snowmen set smooth and cute.
Roll the Cake Balls
Crumble your cooled cake in a big bowl until it’s fine and even. Add a spoonful of frosting and work it in with clean hands. The texture should feel like play dough that holds together without cracking. Add a little more frosting if it’s crumbly. Use a small cookie scoop to portion, then roll smooth balls. For snowmen, I like two sizes, one slightly bigger for the body and a smaller one for the head. Set them on parchment and chill for 15 minutes.
Stick and Chill
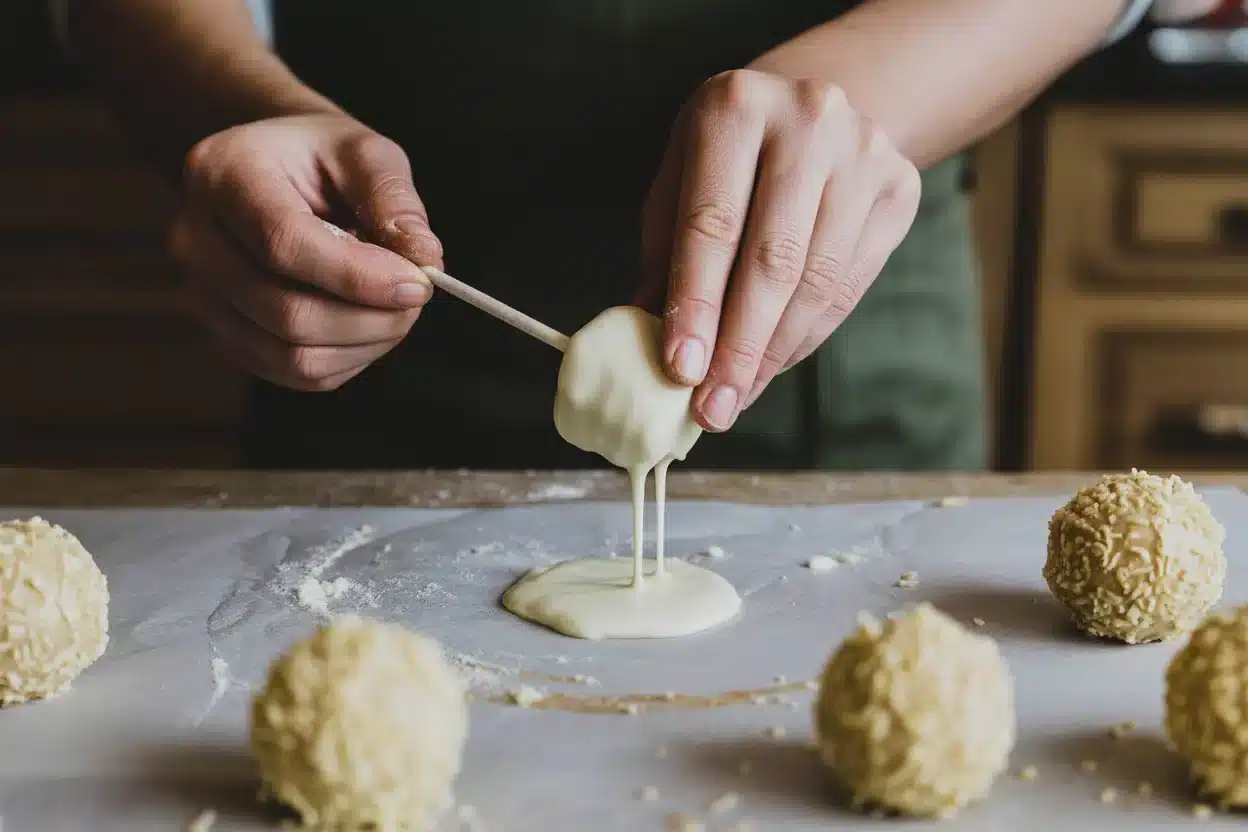
Melt a small amount of white candy melts. Dip the tip of each stick in the melted candy, then insert it into the larger ball. Add a tiny dab of candy melt on top of the body and set the smaller ball on top to make a stacked snowman shape. Chill again until firm, about 15 minutes. This step keeps everything steady when you dip.
Dip and Smooth
Melt the rest of your white candy melts in short bursts in the microwave, stirring until smooth. If it’s too thick, add a half teaspoon of coconut oil. Hold the stick and dip the entire snowman in one gentle motion. Do not stir the pop in the coating. Lift, let excess drip off, and tap your wrist lightly so the surface smooths out. Place upright in a foam block to set. If you ever get drips or bumps, remember that scarves and hats are very forgiving. Want more dipping pointers? I share extra notes in my dessert pops guide.
Face, Buttons, Scarves, and Hats
Before the coating fully sets, press on an orange sprinkle for the carrot nose. Wait a few minutes, then draw eyes and a smile with an edible black marker or dot on tiny sprinkles. Add two or three buttons. Wrap a candy lace around the neck and snip to fit for a scarf. If you’re making hats, glue a mini peanut butter cup or chocolate disc on top with a tiny bit of melted candy. For festive sparkle, add a pinch of white sanding sugar. Let them set completely until dry to the touch.
When everything is set, step back and admire. The expressions will vary, and that’s the charm. These are meant to look handmade and friendly. If you’re building a holiday dessert board, add a few treats from my Halloween dessert pops collection for a fun mix of themes.
STORING LEFTOVER SNOWMAN CAKE POPS
Good news. These store beautifully, which is handy for busy weeks. Keep them in an airtight container at cool room temperature for two to three days. If your kitchen is warm, the fridge is fine, just place a paper towel in the container to catch moisture. For longer storage, freeze them on a sheet pan until solid, then bag individually and store for up to a month. Thaw in the fridge overnight, then bring to room temp before serving so the coating doesn’t sweat. If you need more storage tips for party treats, you can peek at how I pack and save my easy dessert pops.
Snowmen survive car rides too. Place them upright in a foam block or tuck them stick side up in a mason jar. If you’re traveling far, pop them in a small cooler to keep the coating crisp.
TIPS AND TRICKS FOR BEST RESULTS
- Use less frosting than you think. Add just enough to bind. Too much makes the balls heavy and they can slip off the sticks.
- Chill in stages. A short chill after rolling, after sticking, and after dipping keeps everything tidy and gives you clean lines.
- Thin the melts a little. Smooth coating comes from a fluid dip. Start with a tiny bit of coconut oil if your melts are thick.
- Decorate at the right moment. Press on noses while the coating is tacky, draw faces when it’s dry, and use a dot of melted candy to glue hats and scarves.
- Work in small batches. Dip five or six pops at a time so your melts stay warm and smooth. Rewarm in short bursts as needed.
- Keep it simple. Happy faces, tiny buttons, and a bright scarf are enough. The joy is in the cute shape and the soft cake inside.
- Make ahead for sanity. Cake balls can be rolled and frozen for a week. Thaw in the fridge, then dip and decorate the day before serving.
Need ideas for themed parties or kids baking days? I’ve got more fun in my holiday dessert pops roundup, and you can adapt those designs to winter easily.
Common Questions
How do I keep the cake balls from cracking? Cracks usually happen when cold cake meets warm coating. Let chilled cake balls sit at room temp for 5 to 10 minutes before dipping, and keep your coating warm but not hot.
What if my candy melts are too thick? Stir in a small amount of coconut oil or vegetable shortening until it flows like warm syrup. Reheat in short bursts and avoid overheating.
Can I make snowman cake pops gluten free? Yes. Use a gluten free cake mix and confirm your candy decorations are gluten free too. The process stays the same.
How do I get perfectly round shapes? Use a small cookie scoop for portioning and roll lightly with your palms. If they’re sticky, chill for 5 minutes and roll again to smooth.
What’s the best way to draw faces? An edible marker is easiest after the coating dries. If you prefer sprinkles, use a toothpick dipped in melted candy to dot tiny glue spots and place the sprinkles.
A Sweet Little Wrap Up
These snowman cake pops are the kind of holiday project that makes your kitchen feel warm and festive without turning the day into a marathon. You get adorable treats, happy helpers, and a dessert that travels well and stores like a champ. If you want more ideas, I love the playful inspiration in Snowman Cake Pops – Bakerella and the step by step breakdown in Easy Snowman Cake Pops. Grab a box of cake mix, a bag of candy melts, and let the decorating fun begin. You’ve got this, and I can’t wait to hear how your little snow crew turns out.
Snowman Cake Pops
Ingredients
For the Cake Pops
- 1 box baked cake any flavor you love Vanilla, chocolate, red velvet, or spice cake are all winners.
- 2-4 tablespoons frosting Use to bind, start small and add as needed.
- 1 bag white candy melts Can also use white chocolate, but melts set faster.
- 1 teaspoon vegetable shortening or coconut oil To thin the melts if needed.
- 12 sticks cake pop sticks or lollipop sticks
- 1 small bag mini orange candy For noses, such as orange sprinkles or tiny fondant wedges.
- 1 marker or small bag black edible marker or black sprinkles For eyes and buttons; mini chocolate chips work too.
- 1 small bag licorice laces or candy belts For scarves.
- 12 pieces mini peanut butter cups or chocolate discs For optional hats.
- 1 small bag sprinkles Tiny snowflake or white sanding sugar for extra decoration.
Instructions
Preparation
- Crumble your cooled cake in a big bowl until it’s fine and even.
- Add a spoonful of frosting and work it in with clean hands until the texture feels like play dough.
- Portion using a cookie scoop and roll into smooth balls. Chill for 15 minutes.
Assembly
- Melt a small amount of white candy melts and dip the tip of each stick before inserting it into the larger ball.
- Set a smaller ball on top to create the snowman shape and chill until firm.
Dipping and Decorating
- Melt remaining candy melts, dip the snowman pop gently, and allow excess to drip off.
- Press on an orange sprinkle for the nose, draw eyes and a smile, add buttons and wrap with a candy lace for a scarf.
- Place hats on top using melted candy as glue, and sprinkle with sanding sugar if desired.